If you’ve ever wondered about the ins and outs of roof vents, you’re in the right place! In this article, we will explore the rule that governs the use of roof vents and shed light on why they are crucial for your home. So, sit back and relax as we unravel the mystery behind roof vents and discover how they can benefit you and your property.

Introduction
Maintaining a well-ventilated roof is crucial for the overall health and longevity of your home. Roof vents play a vital role in providing proper air circulation and preventing various issues such as moisture buildup, energy inefficiency, and damage to your roof. In this comprehensive article, we will explore the importance of roof vents and their different types. We will also discuss the proper placement, size, and quantity of roof vents, as well as the compliance with local building codes. Additionally, we will delve into the installation factors to consider, common ventilation mistakes to avoid, signs of inadequate roof ventilation, and the necessary maintenance and upkeep of roof vents.
1. Importance of Roof Vents
1.1 Preventing Moisture Buildup
One of the primary functions of roof vents is to prevent the buildup of moisture in your attic or roof space. Without proper ventilation, moist air can become trapped and lead to a variety of problems, including mold and mildew growth, wood rot, and damage to insulation. Roof vents allow for the escape of excess moisture, ensuring a dry and healthy environment.
1.2 Enhancing Energy Efficiency
Roof vents also play a key role in improving the energy efficiency of your home. By allowing hot air to escape during warmer months and preventing cold air from entering during colder months, roof vents help regulate temperatures and reduce the strain on your HVAC system. This, in turn, can lead to significant energy savings and lower utility bills.
1.3 Extending Roof Lifespan
Proper roof ventilation can significantly extend the lifespan of your roof. Excessive heat buildup in your attic can cause shingles to deteriorate prematurely, leading to leaks and costly repairs. By allowing hot air to escape and maintaining a consistent temperature, roof vents help preserve the condition of your roof and prolong its lifespan.

2. Types of Roof Vents
2.1 Ridge Vents
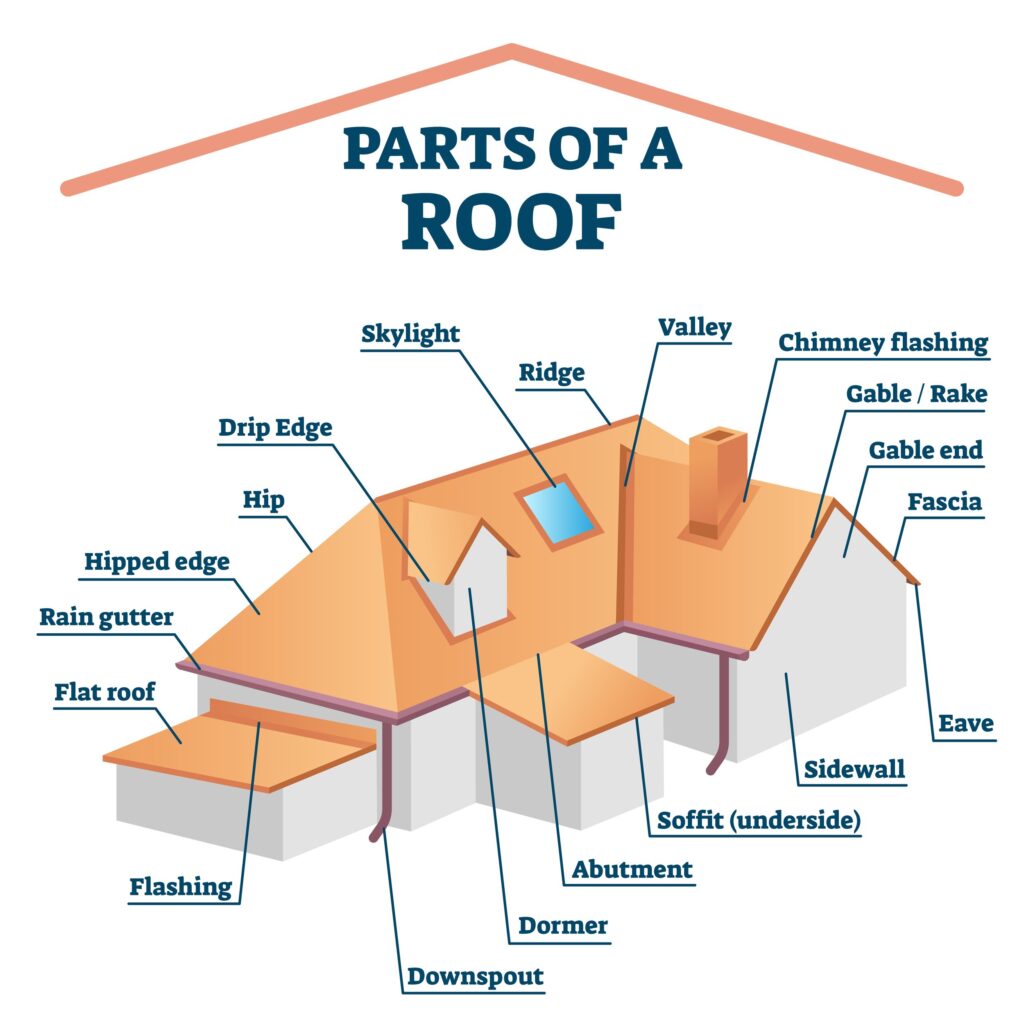
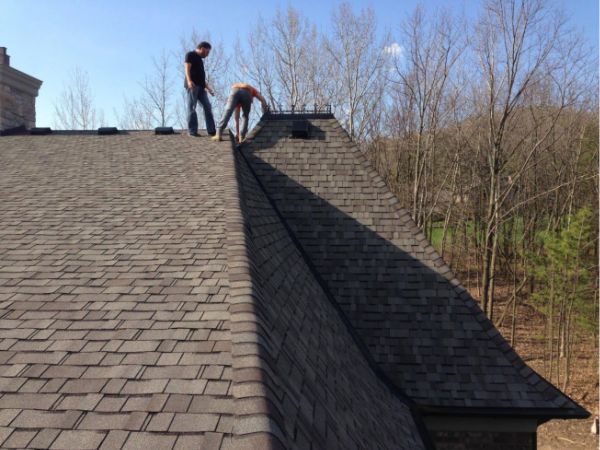
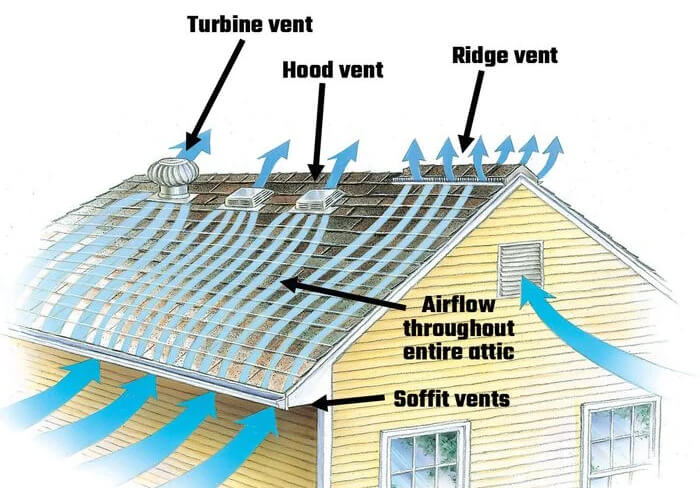
Ridge vents are among the most popular and effective types of roof vents. Installed along the ridge of the roof, these vents provide continuous ventilation along the entire length of the roof. Ridge vents are designed to blend seamlessly with the roofline, ensuring proper airflow without compromising the aesthetic appeal of your home.
2.2 Soffit Vents
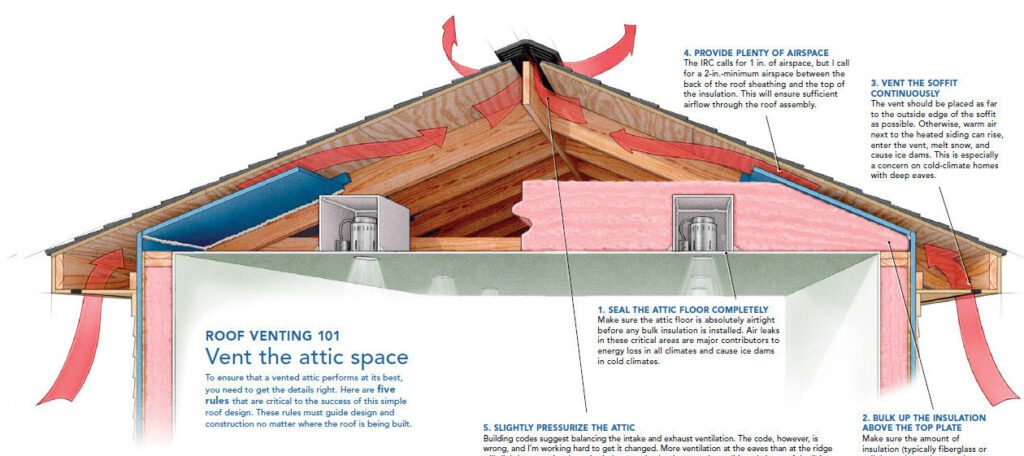
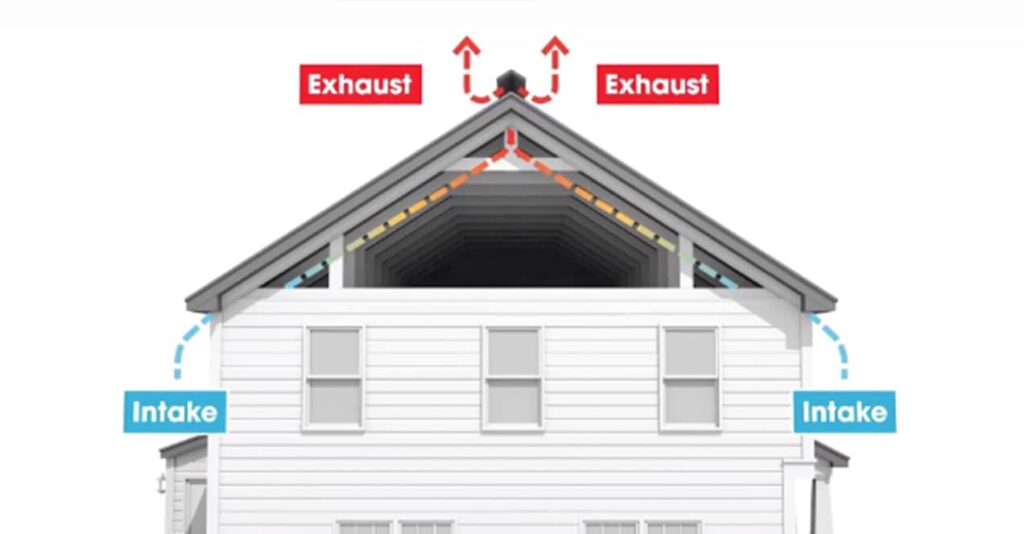
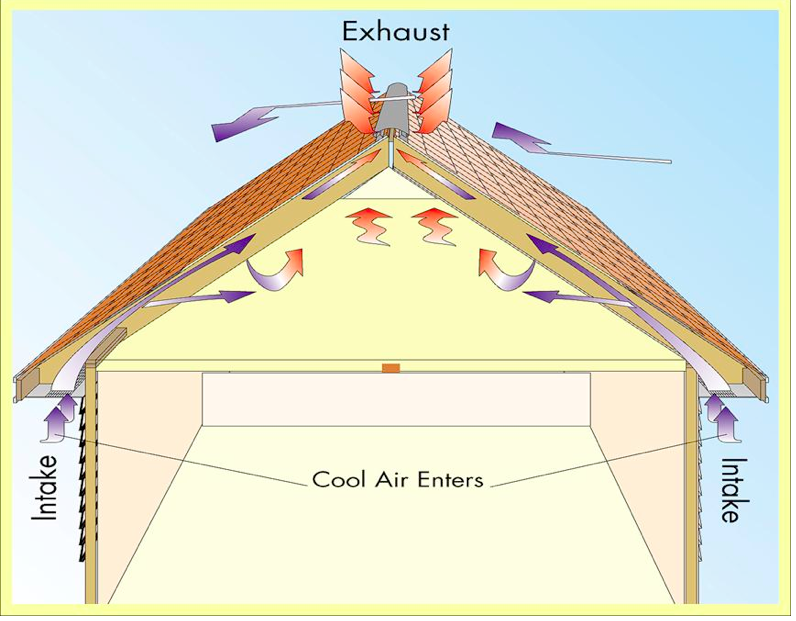
Soffit vents are installed on the underside of the roof’s overhang or eaves, allowing fresh air to enter the attic space. They work in conjunction with ridge vents to create a balanced ventilation system. The intake of cool air through soffit vents helps push hot air out through ridge vents.
2.3 Gable Vents
Gable vents provide ventilation through the gable ends of the roof. They are usually installed in pairs to encourage cross-ventilation, allowing air to flow in from one gable vent and out through the other. Gable vents are a popular choice for homes with gable roofs and can be a visually appealing addition to the exterior of your home.
2.4 Static Vents
Static vents, also known as box vents or louvers, are passive vents that rely on natural convection to allow hot air to escape from the attic. They are static in nature and do not have any moving parts. Static vents are relatively easy to install and can be an affordable ventilation option for homeowners.
2.5 Turbine Vents
Turbine vents, also referred to as whirlybirds or wind turbines, utilize wind power to enhance ventilation. They have a spinning design that rotates with the wind, creating a suction effect that draws hot air out of the attic. Turbine vents are particularly effective in areas with consistently windy conditions.
3. Proper Placement of Roof Vents
3.1 Underlying Principles
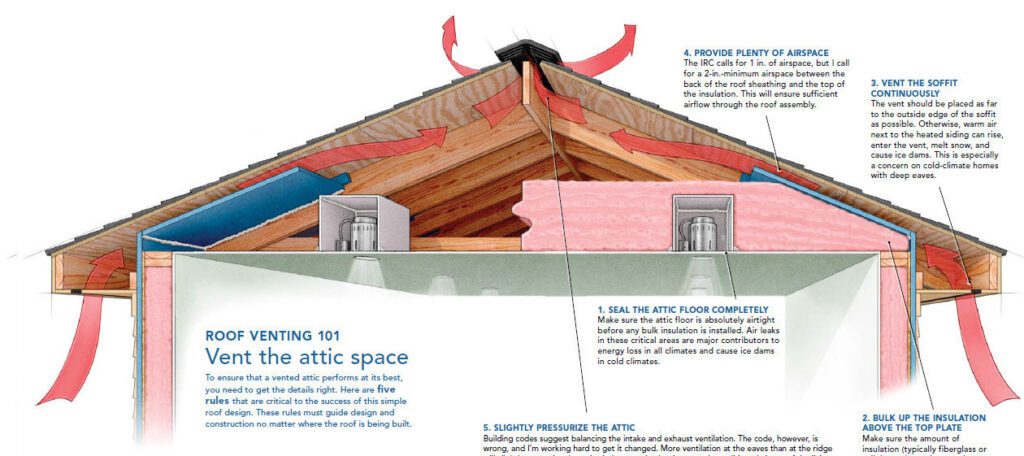
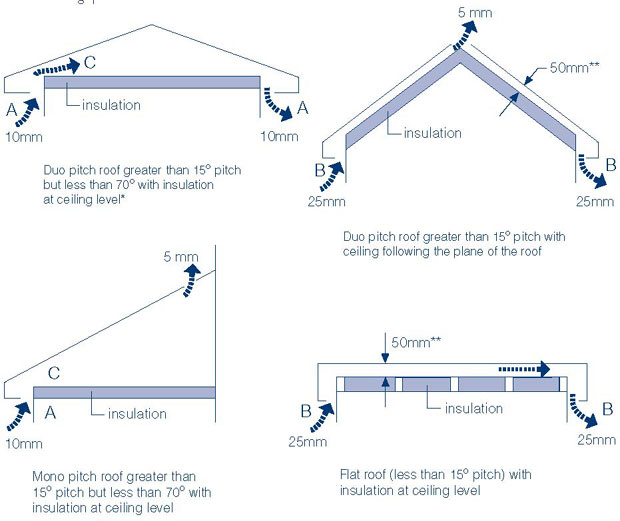
Proper placement of roof vents is essential to ensure effective ventilation. The general principle is to create a balanced system that allows for both intake and exhaust vents. This allows cool air to enter and push warm air out, facilitating a continuous cycle of air circulation. The overall objective is to achieve uniform ventilation throughout the attic space.
3.2 Optimal Roof Ventilation Ratio
The ratio of intake vents to exhaust vents is an important factor to consider when determining the placement of roof vents. The general rule of thumb is to have an equal or slightly greater ventilation area for intake vents compared to exhaust vents. This ratio helps maintain the balance and efficiency of the ventilation system.
3.3 Consideration of Roof Slope
The slope or pitch of your roof can influence the placement of roof vents. Different types of vents may be more suitable for roofs with steeper slopes, while others may be better suited for roofs with shallower slopes. It is important to consider the recommendations provided by the vent manufacturer and consult with a roofing professional for optimal placement on your specific roof type.
3.4 Balance with Intake Vents
Proper placement of roof vents should also take into account the placement and availability of intake vents. The combined system of intake and exhaust vents ensures a continuous flow of air from intake points at the lower portions of the roof to exhaust points at the higher portions. This balanced airflow helps maximize the effectiveness of roof ventilation.

4. Size and Quantity of Roof Vents
4.1 Ventilation Area Calculation
Calculating the ventilation area required for your roof is an important step in determining the size and quantity of roof vents. The ventilation area is typically measured in square feet and is based on the square footage of your attic space. The general guideline is to have approximately 1 square foot of ventilation area for every 150 square feet of attic floor space.
4.2 Determining Vent Quantity
Once the ventilation area is calculated, it can then be used to determine the number of vents required. The size and capacity of the vents will play a role in this calculation. For example, if a ridge vent has a net free area (NFA) of 18 square inches per linear foot, you can divide the total ventilation area by the NFA of each vent to determine the quantity needed.
4.3 Effect of Climate Conditions
It is important to consider the climate conditions in your area when determining the size and quantity of roof vents. Regions with hot and humid climates may require additional ventilation to effectively remove excess heat and moisture. Conversely, colder climates may require fewer vents to maintain proper airflow without compromising insulation and energy efficiency.
5. Compliance with Local Building Codes
5.1 Understanding Building Code Requirements
When installing roof vents, it is crucial to comply with local building codes and regulations. Building codes vary by jurisdiction and often outline specific requirements for roof ventilation based on factors such as climate, roof design, and occupancy type. Familiarize yourself with the building code requirements in your area or consult with a professional to ensure compliance.
5.2 Permits and Inspections
In some cases, obtaining permits and undergoing inspections may be necessary when installing roof vents. The specific requirements for permits and inspections may vary depending on your location and the scope of the ventilation project. It is advisable to check with your local building department to determine the necessary steps and procedures to follow for a compliant installation.

6. Installation Factors to Consider
6.1 Roofing Material Compatibility
When installing roof vents, it is essential to consider the compatibility of the vents with your roofing material. Different types of roof vents may require specific installation methods or additional materials to ensure a proper fit and watertight seal. Consult with the vent manufacturer or a roofing professional to determine the best installation approach for your specific roofing material.
6.2 Proper Flashing and Sealant
To ensure the effectiveness of roof vents, proper flashing and sealant techniques must be employed during the installation process. Flashing prevents water from penetrating the area around the vent, while sealant provides an additional layer of protection against water intrusion. Improper flashing or inadequate sealant can lead to leaks and potential damage to your roof and attic.
6.3 Ventilation Fan Options
In certain cases, especially in areas with limited natural airflow, the installation of ventilation fans may be necessary to enhance roof ventilation. Ventilation fans, such as powered attic fans or solar-powered fans, can supplement the airflow provided by passive roof vents. Consult with a professional to determine if ventilation fans are appropriate for your specific ventilation needs.
7. Common Roof Ventilation Mistakes
7.1 Insufficient Ventilation
Insufficient ventilation is a common mistake homeowners make when it comes to roof ventilation. In an attempt to save costs or due to lack of awareness, some may install fewer vents or use undersized vents, leading to inadequate airflow and poor ventilation. It is important to follow the recommended guidelines and consult with professionals to ensure sufficient ventilation for your attic space.
7.2 Improper Vent Placement
Improper vent placement can hinder the effectiveness of roof ventilation. Placing vents too close together or too far apart can disrupt the airflow pattern and lead to uneven ventilation. It is crucial to follow the recommended spacing and placement guidelines provided by the vent manufacturer or consult with a roofing professional to ensure optimal vent placement.
7.3 Inadequate Vent Maintenance
Neglecting regular maintenance of roof vents can have a detrimental impact on their performance. Over time, vents can become clogged with debris, such as leaves or nesting materials from birds. It is important to regularly clean and inspect roof vents to ensure they are free from any obstructions that may hinder proper airflow. Additionally, damaged or deteriorated vents should be promptly repaired or replaced.

8. Signs of Inadequate Roof Ventilation
8.1 Moisture Problems
One of the most noticeable signs of inadequate roof ventilation is the presence of moisture problems in your attic or roof space. This can manifest as condensation or water droplets on surfaces, mold or mildew growth, or a musty odor. These signs indicate excessive humidity and insufficient airflow, highlighting the need for improved ventilation.
8.2 High Energy Bills
If you notice a significant increase in your energy bills, it could be a sign of inadequate roof ventilation. Insufficient airflow can lead to excessive heat buildup in your attic, forcing your HVAC system to work harder to maintain desired temperatures. By improving roof ventilation, you can reduce the strain on your HVAC system and potentially lower your energy consumption.
8.3 Shingle Damage
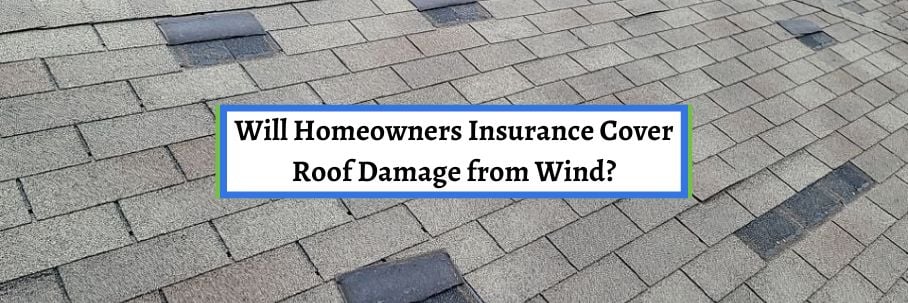
Inadequate roof ventilation can also cause damage to your shingles. Excessive heat trapped in the attic can accelerate the deterioration of shingles, causing them to curl, blister, or crack prematurely. If you notice any signs of shingle damage, it may be indicative of poor ventilation, and it is vital to address the issue promptly to avoid further roof damage.
8.4 Attic Overheating
An overly hot attic is another sign that your roof ventilation is inadequate. During hot summer months, excessive heat buildup in the attic can result in temperatures that far exceed the ambient outdoor temperature. Poor ventilation prevents the escape of this trapped heat, turning your attic into a hot and uncomfortable space. Proper roof ventilation helps prevent attic overheating and maintains a more comfortable environment.
10. Maintenance and Upkeep of Roof Vents
10.1 Regular Cleaning and Inspection
To ensure the optimal performance of roof vents, regular cleaning and inspection are necessary. Remove any debris, such as leaves or twigs, that may accumulate on or around the vents. Inspect the vents for any signs of damage, such as cracks or missing parts, and replace them as needed. Thorough cleaning and inspection should be conducted at least once a year, preferably during the spring or fall.
10.2 Replacement and Repair
If you identify any damaged or deteriorated roof vents during the cleaning and inspection process, it is important to promptly replace or repair them. Damaged vents can compromise the integrity of the entire ventilation system, leading to reduced airflow and potential issues such as leaks or increased energy consumption. Consult with a roofing professional for proper replacement or repair methods.
10.3 Seasonal Maintenance Tips
Seasonal maintenance can help keep your roof vents in optimal condition throughout the year. In the winter, clear vents of snow or ice to prevent blockages. During the fall, remove any fallen leaves or debris that may accumulate on or around the vents. Regularly check the seals and flashing around the vents to ensure they are intact and watertight. By following these seasonal maintenance tips, you can prolong the lifespan of your roof vents and maintain effective roof ventilation.
In conclusion, understanding the importance of roof vents and implementing proper ventilation techniques is crucial for the health and longevity of your home. By preventing moisture buildup, enhancing energy efficiency, and extending the lifespan of your roof, roof vents play a vital role in maintaining a comfortable and structurally sound living environment. By following the guidelines outlined in this article, you can ensure the proper placement, size, and quantity of roof vents, comply with local building codes, and avoid common ventilation mistakes. Regular maintenance and upkeep of roof vents will further ensure their optimal performance and contribute to the overall well-being of your home.

