Have you ever found yourself puzzling over the perplexing question: “Why does my roof look fine but leaks?” It can be incredibly frustrating to have a roof that appears to be in good condition, yet still allows water to seep through. This article will explore the possible reasons why your roof might be leaking, even if it looks perfectly fine from the outside. By understanding these potential causes, you can take steps to address the issue and ensure that your roof provides the protection it should. So, let’s unravel this mystery together and discover why your seemingly fine roof may be leaking.
Common Causes of Hidden Roof Leaks
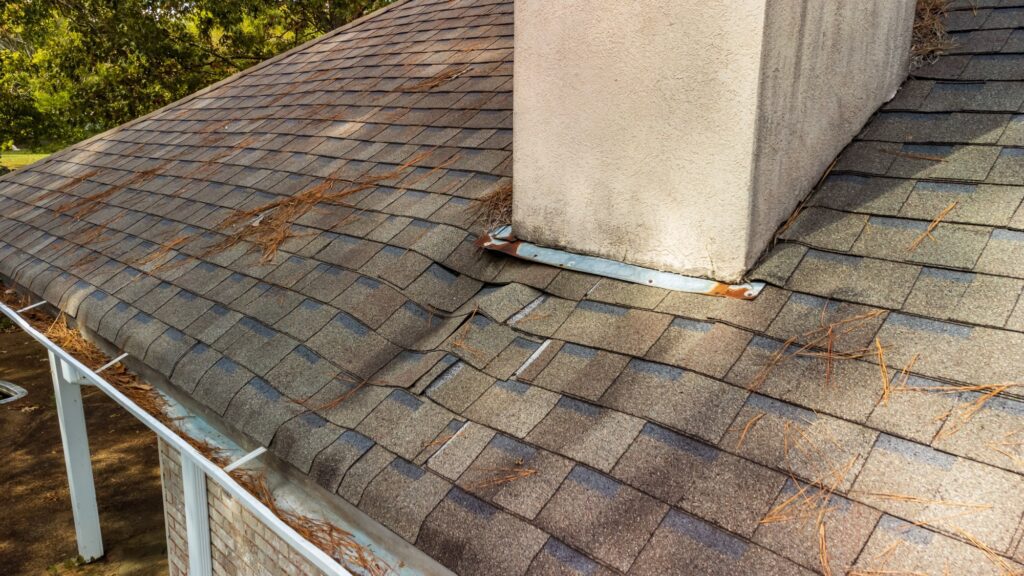
Damaged Flashings
Damaged flashings are a common cause of hidden roof leaks. Flashings are metal pieces that are installed on your roof to seal joints and prevent water from seeping in. Over time, flashings can become damaged or corroded, allowing water to penetrate your roof. It’s important to regularly inspect your flashings and replace any that are cracked or corroded.
Missing or Damaged Shingles
Missing or damaged shingles can also lead to hidden roof leaks. Shingles serve as the outermost layer of protection for your roof, and when they are missing or damaged, water can easily enter your home. High winds, heavy rain, and impact from tree branches or debris can cause shingles to become loose or fall off. If you notice any missing or damaged shingles, it’s crucial to replace them promptly to prevent further damage.
Cracked Vent Booting
Vent booting is a seal around ventilation pipes on your roof. When the booting becomes cracked or damaged, it can allow water to seep into your home. Age, extreme temperatures, and improper installation can all contribute to cracked vent booting. Regularly inspecting your vent booting and repairing any cracks or damage can help prevent hidden roof leaks.
Clogged Gutters and Downspouts
Clogged gutters and downspouts can cause water to overflow onto your roof, leading to leaks. When leaves, debris, or other materials accumulate in your gutters and downspouts, water is unable to flow freely away from your roof. This can result in pooling water that eventually seeps into your home. Regularly cleaning your gutters and downspouts can help prevent clogs and hidden roof leaks.
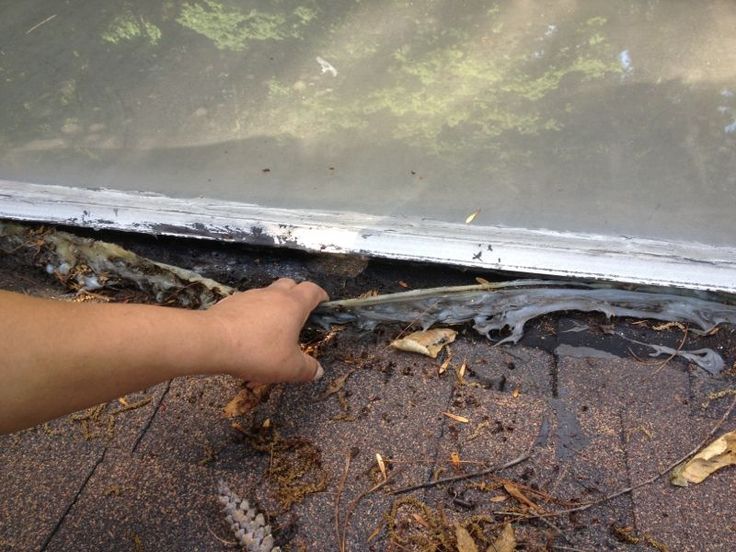
Poorly Sealed Valleys
Roof valleys are the areas where two roof planes intersect. If these valleys are poorly sealed, water can easily seep through and cause leaks. Poor installation, wear and tear, and exposure to the elements can all contribute to improperly sealed valleys. It’s important to inspect your roof valleys regularly and reseal any areas that show signs of damage or deterioration.
Improperly Installed Skylights
Skylights can provide natural light and ventilation in your home, but if they are installed improperly, they can also be a source of hidden roof leaks. Common installation mistakes include improper flashing, inadequate sealing, and improper pitch. These issues can allow water to seep through the skylight and into your home. If you suspect that your skylight is causing a hidden roof leak, it’s best to consult a professional for repairs.
Condensation and Moisture Buildup
Condensation and moisture buildup can occur in your attic, leading to hidden roof leaks. Poor attic ventilation, inadequate insulation, and fluctuating temperatures can all contribute to condensation and moisture buildup. When excess moisture accumulates in your attic, it can damage the roof deck and ultimately lead to leaks. Proper attic ventilation and insulation can help prevent condensation and moisture buildup.
Ice Damming
Ice damming occurs when snow on your roof melts and refreezes at the edges, forming ice dams. These ice dams can prevent water from properly draining off your roof, causing it to back up and seep into your home. This can lead to hidden roof leaks and water damage. Proper insulation and ventilation, as well as regular removal of snow from your roof, can help prevent ice damming and its associated leaks.
Inadequate Attic Ventilation
Inadequate attic ventilation can cause a range of issues, including hidden roof leaks. Without proper ventilation, excess heat and moisture can become trapped in your attic, leading to condensation, mold growth, and roof damage. Regularly inspecting and maintaining your attic ventilation system can help prevent hidden roof leaks caused by inadequate airflow.
Roof Age and Wear
As a roof ages and endures wear and tear, it becomes more susceptible to hidden leaks. Over time, exposure to the elements, thermal expansion and contraction, and general deterioration can cause your roof to weaken and develop leaks. Regular inspections and maintenance can help prolong the lifespan of your roof and identify potential issues before they result in hidden leaks.
Understanding Damaged Flashings
What are Flashings?
Flashings are thin metal strips or sheets that are used to waterproof and protect the areas where different roof components meet or intersect. They are typically made of materials such as aluminum, copper, or galvanized steel. Flashings are installed around chimneys, skylights, vents, and other roof protrusions to create a watertight seal and prevent water from seeping into your home.
Types of Flashings
There are several types of flashings commonly used in roofing systems:
-
Base Flashing: Base flashings are installed on the flat areas of the roof, such as along walls or chimneys, to provide additional protection against water intrusion. They are typically installed under the shingles and overlap with the rest of the flashing components.
-
Step Flashing: Step flashings are used on sloped roofs at the areas where the roof meets vertical walls. They are installed in a stepped pattern and work in conjunction with the shingles to create a watertight barrier.
-
Counter Flashing: Counter flashings are installed over the base flashings to cover and protect them. They are typically installed on top of brick walls, chimney stacks, or other vertical surfaces that intersect with the roof.
-
Vent Pipe Flashing: Vent pipe flashings are used to seal around vent pipes that protrude through the roof. They typically consist of a rubber boot that is secured around the pipe and a metal flange that is nailed or screwed down onto the roof.
Common Flashing Problems
There are several common problems that can occur with flashings, leading to hidden roof leaks:
-
Cracks or Breaks: Flashings can develop cracks or breaks over time due to exposure to the elements, thermal expansion and contraction, or physical damage. These cracks or breaks can allow water to seep into your home.
-
Corrosion: If flashings are made of metal, they can corrode over time, especially if they are exposed to moisture or chemicals. Corrosion can weaken the flashing and compromise its ability to create a watertight seal.
-
Loose or Missing Flashings: Flashings can become loose or dislodged due to high winds, improper installation, or general wear and tear. When flashings are loose or missing, water can easily enter your home.
How to Fix Damaged Flashings
Repairing damaged flashings is crucial to preventing hidden roof leaks. Here are some steps to take when fixing damaged flashings:
-
Inspect the Flashings: Carefully examine the flashings on your roof to identify any signs of damage, such as cracks, breaks, or corrosion. Pay close attention to areas where different roof components intersect, such as chimneys, skylights, and vents.
-
Remove Old Flashing: If the flashing is severely damaged or beyond repair, remove it carefully using a pry bar or other appropriate tools. Take care not to damage the surrounding roofing materials.
-
Clean the Area: Before installing new flashings, clean the area thoroughly to remove any debris, dirt, or old sealant. Use a brush or a soft cloth to ensure the surface is clean and dry.
-
Install New Flashing: Cut the replacement flashing to the appropriate size and shape, ensuring a proper fit. Secure the flashing in place using nails or screws, depending on the material and design of the flashing.
-
Apply Sealant: Apply a high-quality roofing sealant around the edges of the flashing to create a watertight seal. Make sure to follow the manufacturer’s instructions for proper application and drying time.
-
Check for Proper Installation: After installing the new flashing, inspect the area to ensure it is installed correctly and securely. Look for any gaps or areas where the flashing may not be properly sealed.
Remember, if you are unsure or uncomfortable with repairing damaged flashings yourself, it’s always best to consult a professional roofing contractor. They have the expertise and experience to properly inspect, repair, or replace damaged flashings to prevent hidden roof leaks and further damage to your home.

Missing or Damaged Shingles
Causes of Missing or Damaged Shingles
Missing or damaged shingles can result from a variety of causes:
-
Extreme Weather Conditions: High winds, heavy rain, hailstorms, or snowstorms can cause shingles to become dislodged or damaged. The force of these weather events can lift shingles or cause them to break or tear.
-
Age and General Wear: As shingles age, they begin to deteriorate and lose their effectiveness. Over time, the sun’s ultraviolet (UV) rays, temperature fluctuations, and exposure to the elements can cause shingles to become brittle, crack, or curl. This can lead to their detachment or complete loss.
-
Improper Installation: Shingles that are not properly installed may not be securely fastened to the roof, making them more vulnerable to being blown off. Additionally, if the correct number or type of nails or adhesive is not used during installation, shingles may not adhere properly and can become loose or detached over time.
-
Impact Damage: Falling tree branches, debris, or other objects can impact the roof and damage the shingles. This can result in shingles being dislodged or punctured, compromising their ability to protect your home.
Signs of Missing or Damaged Shingles
It’s essential to regularly inspect your roof for signs of missing or damaged shingles. Here are some indicators to look out for:
-
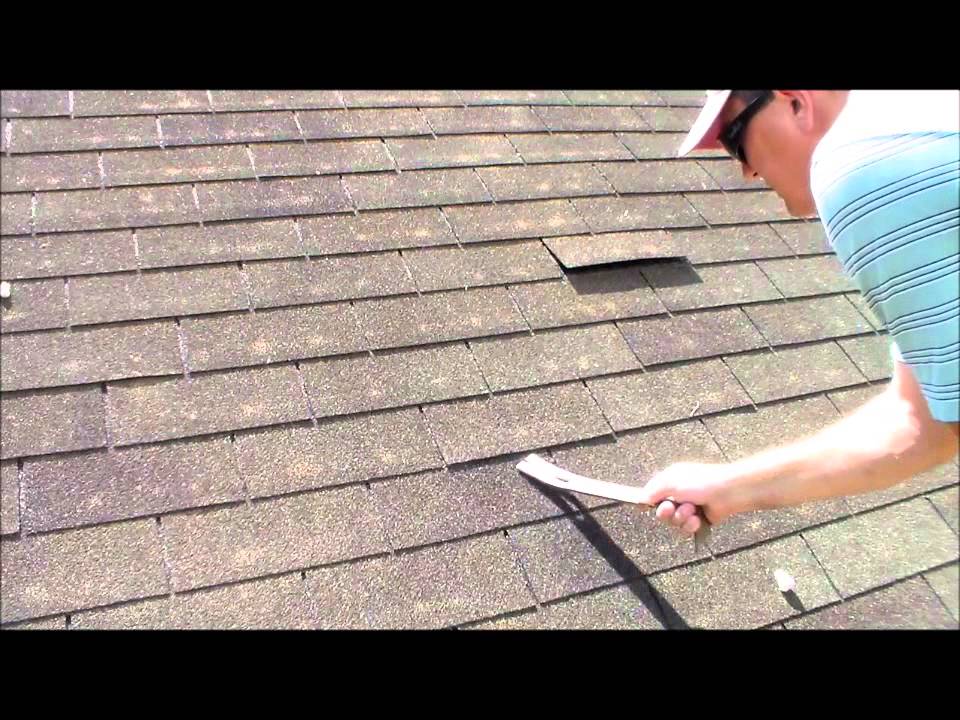
Visible Gaps in Shingle Coverage: If you notice areas on your roof where the shingles are missing or the underlayment is exposed, it’s a clear sign that shingles have been lost or damaged. These gaps create entry points for water and can lead to hidden roof leaks.
-
Curled, Cracked, or Torn Shingles: Shingles that are curling at the edges, cracked, or torn are likely to be compromised and may need to be replaced. These damaged shingles are more susceptible to wind uplift and water infiltration.
-
Granule Loss: Asphalt shingles are coated with granules that enhance their durability and protect them from UV rays. If you notice an excessive amount of granules accumulating in your gutters or on the ground around your home, it may indicate that your shingles are wearing out and need to be replaced.
-
Sagging or Uneven Roof Surface: When multiple shingles are missing or damaged, it can cause the underlying roof structure to become weakened or compromised. This can result in a sagging or uneven roof surface, which is a clear sign that immediate action is needed.
Repairing or Replacing Damaged Shingles
Repairing or replacing damaged shingles is essential to maintain the integrity of your roof and prevent hidden leaks. Depending on the extent of the damage, here are some steps to take:
-
Inspect the Roof: Carefully examine your roof for signs of missing or damaged shingles. If only a few shingles are affected, you may be able to repair them individually. However, if a significant portion of your roof is damaged, it may be necessary to consider a full roof replacement.
-
Secure Loose Shingles: If shingles are loose but not significantly damaged, you can secure them by reattaching them with roofing adhesive or sealant. Apply the adhesive under the lifted shingle and press it down firmly. Be sure to follow the manufacturer’s instructions and allow sufficient drying time.
-
Replace Severely Damaged Shingles: If shingles are cracked, torn, or show signs of advanced wear, they should be replaced. Carefully remove the damaged shingles by lifting the edges and sliding a pry bar underneath. Once removed, install new shingles according to the manufacturer’s instructions and nail them securely in place.
-
Consider Professional Assistance: If the extent of shingle damage is significant or if you are unsure about the repair process, it’s advisable to seek professional help from a roofing contractor. They have the necessary skills, experience, and equipment to ensure proper shingle replacement and minimize the risk of hidden roof leaks.
Remember, regular roof inspections and maintenance can help identify and address missing or damaged shingles before they lead to more significant problems. Investing the time and effort in maintaining your roof will contribute to its longevity and protect your home from hidden roof leaks.
Cracked Vent Booting
What is Vent Booting?
Vent booting refers to the sealing and protection of ventilation pipes that protrude through your roof. These pipes are essential for proper air circulation in your home’s plumbing system, bathrooms, or kitchen. Vent booting typically involves the use of a rubber boot that wraps around the pipe and a metal flange that is secured to the roof.
Causes of Cracked Vent Booting
Cracked vent booting can occur due to various factors, including:
-
Age and Deterioration: Over time, the rubber boot used in vent booting can deteriorate due to exposure to UV rays, extreme temperatures, and general wear and tear. This can cause it to become brittle and susceptible to cracking or breaking.
-
Ponding Water: If water accumulates around the vent booting area, it can cause the rubber boot to degrade or weaken. Ponding water can occur due to inadequate drainage, clogged gutters, or a faulty roof design.
-
Roof Movement and Settling: Roof movement or settling can place stress on the vent booting, causing it to crack or become damaged. This can occur due to structural issues, shifting foundations, or thermal expansion and contraction.
-
Improper Installation: Vent booting must be installed correctly to ensure a proper seal and prevent leaks. If the boot is not securely attached to the roof or if the metal flange is not properly sealed, it can lead to cracking or compromised integrity.
Detecting and Repairing Cracked Vent Booting
Detecting and repairing cracked vent booting is essential to prevent hidden roof leaks. Here’s what you can do:
-
Inspect the Vent Booting: Regularly inspect the vent booting on your roof to identify any signs of cracking, damage, or deterioration. Look for visible cracks, tears, or areas where the rubber boot is pulling away from the pipe or roof.
-
Assess the Extent of Damage: Determine the severity of the cracked vent booting. If the damage is minimal and limited to small cracks, you may be able to repair it yourself. However, significant damage or an older booting may require professional assistance.
-
Apply Roofing Sealant: If the cracks or damage in the vent booting are minor, you can seal them temporarily using roofing sealant. Clean the area around the crack and apply the sealant, ensuring that it covers the damaged area and creates a watertight seal.
-
Replace the Vent Booting: If the vent booting has extensive cracks, is significantly deteriorated, or if the roofing sealant isn’t providing an effective solution, it’s best to replace the booting. Consult a professional roofing contractor to ensure proper installation and a secure seal.
Remember, vent booting repairs should be addressed promptly to prevent water infiltration and hidden roof leaks. Regular maintenance, including inspections and addressing any issues promptly, will help ensure the integrity and longevity of your roof.

Clogged Gutters and Downspouts
Importance of Proper Gutter and Downspout Maintenance
Proper gutter and downspout maintenance play a vital role in preventing hidden roof leaks. Here’s why it’s important:
-
Water Diversion: Gutters and downspouts are designed to collect rainwater from your roof and direct it away from your home’s foundation. If they are clogged or not functioning correctly, water can accumulate on your roof and seep into your home, leading to hidden leaks and potential water damage.
-
Preventing Ice Damming: Clogged gutters can contribute to ice damming, a condition where ice builds up at the edge of your roof, preventing proper water drainage. This can lead to water backing up under the shingles and into your home, causing hidden leaks and structural damage.
-
Preserving the Roof’s Integrity: By effectively diverting water away from your roof, properly maintained gutters and downspouts help prevent excess moisture and standing water on your roof. This helps to preserve the integrity of your roofing materials, minimizing the risk of damage or premature wear.
Signs of Clogged Gutters and Downspouts
It’s crucial to be aware of the signs of clogged gutters and downspouts. Here are some indicators to look out for:
-
Overflowing Gutters: If water overflows from the gutters during a rainfall, it likely indicates a blockage. This could be caused by leaves, debris, or other materials obstructing the flow of water through the gutters and downspouts.
-
Pooling Water: Look for areas of pooling water or moisture around the foundation of your home. This can occur if gutters are clogged and unable to effectively divert water away from your home.
-
Sagging Gutters: If your gutters appear to be sagging or pulling away from the fascia board, it may indicate excess weight due to debris buildup. This can compromise the structural integrity of the gutters and prevent proper water drainage.
-
Visible Debris or Plant Growth: If you notice leaves, twigs, or other debris protruding from the gutters or growing vegetation, it’s a clear sign of clogs. These clogs can prevent water from freely flowing through the gutters and downspouts.
Clearing Clogged Gutters and Downspouts
Clearing clogged gutters and downspouts is vital to preventing hidden roof leaks. Here’s what you can do:
-
Inspect the Gutters: Carefully inspect your gutters to assess the extent of the clog. Ensure that you have a sturdy ladder and take necessary safety precautions while working at heights.
-
Remove Debris: Use a gutter scoop, gloves, or a small trowel to remove leaves, twigs, and other debris from the gutters. Start at the downspout and work your way along the length of the gutter. Dispose of the debris in a trash bag or compost pile.
-
Flush the Gutters: Once the majority of the debris is removed, use a garden hose with a high-pressure nozzle to flush out any remaining dirt or small debris. Direct the water toward the downspout and ensure that it flows freely without any obstructions.
-
Clear the Downspouts: If water is not freely flowing through the downspouts, it may indicate a clog. Use a plumber’s snake or a long, flexible wire to break up and remove any blockages. Alternatively, you can use a high-pressure nozzle on your garden hose to force water through the downspout and clear the clog.
-
Consider Gutter Guards: Installing gutter guards or screens can help prevent future clogs by blocking debris from entering the gutters. These guards allow water to flow freely while keeping leaves and other debris out.
Regular gutter and downspout maintenance, including cleaning and inspections, should be performed at least twice a year and more frequently if needed. Proper maintenance will help ensure that your gutters and downspouts function effectively in diverting water away from your roof and preventing hidden roof leaks.
Poorly Sealed Valleys
What are Roof Valleys?
Roof valleys are the V-shaped areas where two roof planes intersect. These valleys are designed to collect rainwater and direct it safely off your roof. Properly sealed valleys are crucial for preventing water damage and hidden roof leaks.
Problems with Poorly Sealed Valleys
If roof valleys are poorly sealed or damaged, it can lead to several issues:
-
Water Infiltration: Poorly sealed valleys can allow water to penetrate your roof, leading to hidden leaks and potential water damage. When rainwater does not flow freely through the valleys, it can pool, accumulate, and seep into your home.
-
Ice Damming: In cold climates, poorly sealed valleys can contribute to ice damming. When snow on your roof melts and refreezes in the valleys, it can block the natural drainage path and cause water to back up under the shingles.
-
Premature Roof Wear: When water is not effectively directed off the roof through the valleys, it can cause excess moisture buildup. This can lead to premature wear and deterioration of the roofing materials, shortening the lifespan of your roof.
-
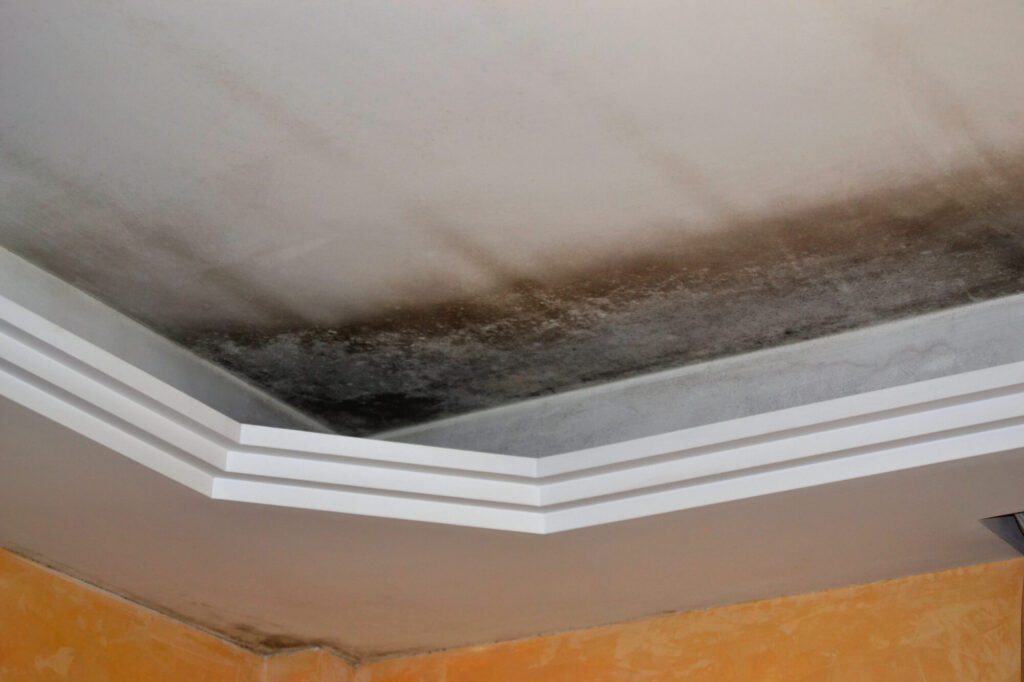
Mold and Mildew Growth: Excess moisture in poorly sealed valleys can create an ideal environment for mold and mildew growth. This not only poses health risks but can also lead to further damage to your roof and potentially other areas of your home.
Repairing Poorly Sealed Valleys
Repairing poorly sealed valleys is essential to prevent hidden roof leaks and water damage. Here’s how to address the issue:
-
Inspect the Valleys: Carefully examine the valleys of your roof to identify any signs of damage or poor sealing. Look for gaps, cracks, or areas where the sealing material may be deteriorating. Take note of any loose or dislodged shingles in the valley area.
-
Remove Damaged Materials: If the sealing material or shingles in the valleys are damaged, carefully remove them using a pry bar or appropriate tools. Take care not to damage the adjacent roofing materials.
-
Clean and Dry the Area: Before resealing the valleys, clean the area thoroughly to remove any dirt, debris, or old sealing material. Ensure that the surface is dry before proceeding with repairs.
-
Apply Roofing Sealant: Apply a high-quality roofing sealant along the entire valley area. Use a caulking gun or trowel to create a smooth, even layer of sealant. Ensure that the sealant covers any gaps, cracks, or seams, creating a watertight barrier.
-
Replace Damaged Shingles: If any shingles in the valley area are damaged, replace them with new ones. Follow the manufacturer’s instructions for proper installation and secure each shingle with nails or roofing adhesive.
-
Inspect and Maintain Regularly: After repairing the poorly sealed valleys, inspect them regularly to ensure that the sealant is intact and the shingles are secure. Perform routine roof maintenance, including inspections and cleaning, to prevent future issues.
If you are unsure about repairing poorly sealed valleys yourself or if the damage is extensive, it’s best to consult a professional roofing contractor. They have the necessary expertise and experience to identify and address issues with the valleys, ensuring the longevity and effectiveness of your roof.

Improperly Installed Skylights
Common Skylight Installation Mistakes
Skylights can enhance the beauty of your home and provide natural lighting and ventilation. However, when skylights are improperly installed, they can become a source of hidden roof leaks. Here are some common installation mistakes to watch out for:
-
Improper Flashing Installation: Flashing is essential for ensuring a watertight seal around skylights. Improper installation of flashing, such as inadequate overlap or failure to use appropriate sealing materials, can allow water to penetrate your roof.
-
Inadequate Skylight Pitch: The pitch, or slope, of a skylight is crucial for proper water drainage. If the skylight is not installed with the correct pitch, water may accumulate and seep into your home rather than draining off the roof.
-
Lack of Insulation and Condensation Control: Proper insulation and condensation control measures are essential for skylight installations. Without adequate insulation, skylights can become susceptible to condensation, leading to moisture buildup and potential leaks.
-
Poor Frame Sealing: Skylight frames must be sealed properly to prevent water infiltration. If the frame is not sealed tight against the roof, water can enter through the gaps and cause hidden roof leaks.
Leaks Caused by Improper Skylight Installation
Improperly installed skylights can lead to various types of leaks, including:
-
Visible Water Stains: One of the first signs of a hidden skylight leak is visible water stains on your ceiling or walls. These stains may appear near the skylight or some distance away, making it challenging to identify the exact source of the leak.
-
Drip or Water Trickle: If you notice water dripping or trickling from your skylight during rainfall or when snow is melting, it’s a clear indication of a leak. This suggests that water is entering your home through the skylight.
-
Saturated or Damaged Drywall: Prolonged skylight leaks can saturate the surrounding drywall, causing it to become soft, discolored, or even damaged. This can lead to further issues such as mold growth and compromised structural integrity.
-
Condensation Issues: Improper skylight installations can result in condensation buildup between the skylight and the glass or frame. This can lead to excess moisture, which may eventually lead to hidden leaks or other problems such as mold growth.
Fixing Leaks from Improperly Installed Skylights
Fixing leaks from improperly installed skylights requires proper identification and addressing of the underlying issues. Here’s what you can do:
-
Inspect the Skylight: Conduct a thorough inspection of the skylight to determine the source of the leak. Look for signs of damage, gaps, or improper sealing. Check the flashing, frame, glass, and surrounding roofing materials.
-
Repair or Replace Flashing: If the flashing around the skylight is damaged or improperly installed, repair or replace it. Ensure that the flashing overlaps correctly with the surrounding roofing materials and use appropriate sealing materials to ensure a watertight seal.
-
Re-Seal the Frame: If the skylight frame is not properly sealed against the roof, remove any existing sealant and re-seal the frame using a high-quality roofing sealant. Make sure to follow the manufacturer’s instructions and apply the sealant evenly for a tight seal.
-
Consider Insulation and Condensation Control: Install or improve insulation around the skylight to prevent condensation and reduce the risk of leaks. Consult with a professional contractor to ensure proper insulation and condensation control measures are implemented.
-
Consult a Professional: If you are uncertain about fixing the leak yourself or if the issue is more complex, it’s best to consult a professional roofing contractor. They have the expertise and experience to accurately identify and repair skylight installation errors, ensuring a long-lasting and leak-free skylight.
Regular maintenance and inspection of your skylights, including checking for signs of leaks, can help identify issues early on and prevent hidden roof leaks. Addressing any skylight installation mistakes promptly will protect your home from water damage and ensure the longevity of your roof.
Condensation and Moisture Buildup
Understanding Condensation and Moisture Buildup
Condensation and moisture buildup can occur in and around your roof, leading to hidden leaks and potential water damage. Understanding the causes and solutions for condensation is essential for maintaining a dry and healthy home.
Causes of Condensation on the Roof
Condensation can form when warm, moist air comes into contact with a cold surface. Several factors can contribute to condensation on your roof:
-
Inadequate Ventilation: Poor attic ventilation can trap warm, humid air in your attic. This air can then come into contact with the cooler roof surface, causing condensation to form.
-
Insufficient Insulation: Inadequate insulation can allow warm, moist air from your living spaces to penetrate into the attic and come into contact with the roof. This can lead to condensation forming on the underside of the roof deck.
-
Fluctuating Temperatures: Rapid temperature changes or significant temperature differentials between the inside and outside of your home can contribute to condensation. This occurs when warm, moist air comes into contact with a cold roof surface.
-
Air Leaks: Air leaks in your attic or around vents, light fixtures, or other openings can allow warm, moist air to enter. This can result in condensation on the roof and potential hidden leaks.
Effective Ways to Reduce Condensation and Moisture Buildup
Reducing condensation and moisture buildup is crucial for preventing hidden roof leaks and maintaining a healthy, dry home. Here are some effective ways to address the issue:
-
Improve Attic Ventilation: Ensure that your attic has adequate ventilation to allow for the free flow of air. This helps to remove excess heat and moisture, reducing the likelihood of condensation forming on the roof. Consider installing ridge vents, soffit vents, or powered attic ventilators if needed.
-
Proper Insulation: Insulating your attic effectively helps to create a thermal barrier, reducing heat transfer between your living spaces and the roof. This can help prevent warm, moist air from reaching the roof surface and condensing. Consult with a professional to ensure appropriate insulation levels and installation.
-
Seal Air Leaks: Identify and seal any air leaks in your attic or around vents, light fixtures, or other openings. Use caulk or weatherstripping to seal gaps and cracks, preventing warm, moist air from infiltrating your attic and creating condensation.
-
Monitor Humidity Levels: Use a hygrometer to monitor the humidity levels inside your home. Keeping humidity levels within the recommended range (usually between 30-50%) helps to prevent excessive moisture that can lead to condensation. Use dehumidifiers if necessary to maintain optimal humidity levels.
-
Ventilate Moisture-Producing Areas: Properly ventilate areas in your home that produce excess moisture, such as bathrooms, kitchens, and laundry rooms. Use exhaust fans to remove humid air and direct it outside, minimizing the chances of it reaching your attic and roof.
-
Regular Maintenance: Perform routine maintenance, including inspections and cleaning, to ensure that your roof and attic remain in good condition. Regularly check for signs of condensation, moisture buildup, or hidden leaks and address any issues immediately.
By implementing these strategies, you can effectively reduce condensation and moisture buildup in your home, preventing hidden roof leaks and potential water damage. Remember, proper ventilation, insulation, and proactive maintenance are key to maintaining a healthy and leak-free roof.

Ice Damming
What is Ice Damming?
Ice damming occurs when snow on your roof melts and refreezes at the edges, forming ice dams. These ice dams can prevent water from properly draining off your roof, leading to hidden roof leaks and potential water damage.
Causes and Effects of Ice Damming
Several factors contribute to the formation of ice dams and their associated effects:
-
Inadequate Insulation and Ventilation: Insufficient insulation and inadequate ventilation can cause heat to escape from your attic, melting the snow on your roof. As the melted snow reaches the cooler edges, it refreezes and forms ice dams, blocking the natural flow of water.
-
Fluctuating Temperatures: Rapid temperature changes, such as warming during the day and freezing at night, can contribute to ice damming. These fluctuations promote the melting and refreezing of snow, allowing ice dams to form.
-
Poor Roof Design: Roof designs that lack proper slope or have complex angles can contribute to ice damming. These designs prevent snow from easily sliding off the roof, causing it to accumulate and increase the likelihood of ice dam formation.
-
Clogged Gutters and Downspouts: Clogged gutters and downspouts can impede proper water flow from the roof. The accumulated water can freeze and contribute to the formation of ice dams.
Effects of ice damming include:
-
Hidden Roof Leaks: Ice dams can prevent melting snow from draining off the roof, causing the water to back up under the shingles and into your home. This can lead to hidden roof leaks and potential water damage.
-
Damaged Gutters: The weight of ice dams can stress and damage gutters, causing them to become loose, sag, or detach from your home. This compromises their effectiveness in diverting water away from the roof.
-
Structural Damage: Prolonged ice damming can result in water infiltration and damage to your roof’s structure. This can weaken the roof deck, rafters, or sheathing, leading to structural deterioration.
Preventing and Addressing Ice Damming Issues
Preventing and addressing ice damming can help protect your home from hidden roof leaks and potential damage. Here are some preventative measures and solutions:
-
Insulate and Ventilate: Ensure that your attic is properly insulated and ventilated to prevent heat loss and even roof temperature. Adequate insulation and ventilation help maintain a consistent roof temperature, reducing the likelihood of snow melting and ice dam formation.
-
Remove Snow: Safely remove snow from your roof using a roof rake or other appropriate tools. Clearing snow from the roof can prevent its accumulation and reduce the risk of ice dam formation.
-
Ice Dam Prevention Systems: Consider installing ice dam prevention systems, such as heat cables or panels, along the roof’s edges. These systems help melt snow and prevent ice dams from forming. Consult with a professional to determine the most effective system for your specific roofing needs.
-
Improve Roof Design: If you’re planning to replace your roof or are building a new home, consider designing the roof with appropriate slope and overhangs. This promotes natural snow shedding and reduces the likelihood of ice damming.
-
Clean Gutters and Downspouts: Regularly clean and maintain your gutters and downspouts to ensure proper water flow. Removing debris and clogs reduces the chances of water backup and ice dam formation.
-
Professional Roof Inspection: If you have concerns about ice damming or are experiencing hidden roof leaks, consult a professional roofing contractor. They can conduct a comprehensive inspection, identify underlying issues, and recommend appropriate solutions.
Remember, proactive measures and regular maintenance are key to preventing and addressing ice damming. By addressing ice dams promptly, you can minimize the risk of hidden roof leaks and protect your home from potential water damage.
Roof Age and Wear
Signs of Aging and Wear
Roofs, like any other component of your home, age and wear over time. Recognizing the signs of an aged or worn-out roof is crucial for preventing hidden roof leaks and addressing issues promptly. Here are some signs to watch for:
-
Missing or Damaged Shingles: Over time, shingles can become loose, brittle, or fall off completely. Missing or damaged shingles are clear indicators of an aging or worn-out roof.
-
Curling or Buckling Shingles: Shingles that are curling at the edges or buckling can signal age and wear. This occurs when shingles lose their flexibility and integrity due to prolonged exposure to the elements.
-
Granule Loss: Asphalt shingles are coated with granules that enhance their durability and protect them from the sun’s UV rays. If you notice excessive granule loss accumulating in your gutters or around your home, it may indicate an aged roof that requires attention.
-
Sagging or Uneven Roof Surface: An aged or worn-out roof may develop a sagging or uneven surface. This can be caused by weakened or damaged roof deck, trusses, or rafters. A sagging roof is a clear indication that immediate action is needed.
-
Visible Water Stains or Moisture: Water stains on your ceilings or walls, mold growth, or visible moisture are visible signs of hidden roof leaks and potential damage. These signs can indicate an aged or deteriorated roof that requires attention.
Impact of an Old or Worn-Out Roof
An old or worn-out roof can have several impacts on your home:
-
Hidden Roof Leaks: As an aging roof starts to deteriorate, it becomes more susceptible to hidden roof leaks. These leaks can cause initial damage to the roofing structure and may eventually result in water damage to your home.
-
Decreased Energy Efficiency: An aged or worn-out roof may lack proper insulation and ventilation, leading to decreased energy efficiency. This can result in higher utility bills as your heating and cooling systems work harder to maintain a comfortable temperature.
-
Compromised Structural Integrity: A roof that is nearing the end of its lifespan can compromise the structural integrity of your home. Damaged roofing materials, weakened decking, or compromised supports can affect the overall stability and safety of your house.
-
Reduced Property Value: An old or deteriorated roof can negatively impact the value of your home. Potential buyers may be deterred by the need for immediate roof replacement or repairs, resulting in a lower selling price.
Roof Replacement and Maintenance Tips
When dealing with an old or worn-out roof, consider the following tips:
-
Schedule Regular Roof Inspections: Regular professional roof inspections can help identify signs of wear and catch hidden issues before they worsen. Schedule inspections at least once a year or after severe weather events.
-
Repair Minor Damage Promptly: Addressing minor roof damage, such as missing or damaged shingles, promptly can help extend the lifespan of your roof. Hire a professional roofer to undertake any necessary repairs.
-
Perform Routine Maintenance: Regularly clean your roof, inspect your gutters and downspouts, and ensure proper ventilation and insulation. Routine maintenance helps keep your roof in good condition and extends its lifespan.
-
Consider Roof Replacement: If your roof is old, extensively worn, or showing multiple signs of damage, it may be time for a roof replacement. Consult with a professional roofing contractor to assess the condition of your roof and determine the best course of action.
-
Choose High-Quality Roofing Materials: When replacing your roof, opt for high-quality roofing materials that offer durability and longevity. Work with a reputable roofing contractor to ensure proper installation.
-
Invest in Proper Insulation and Ventilation: Proper insulation and ventilation are essential for maintaining a healthy and long-lasting roof. Consider improvements to insulation and ventilation when replacing your roof, if needed.
Remember, an aged or worn-out roof should be addressed promptly to prevent hidden roof leaks and potential damage. Regular maintenance, inspections, and potential roof replacement will help ensure your home remains safe, dry, and well-protected.