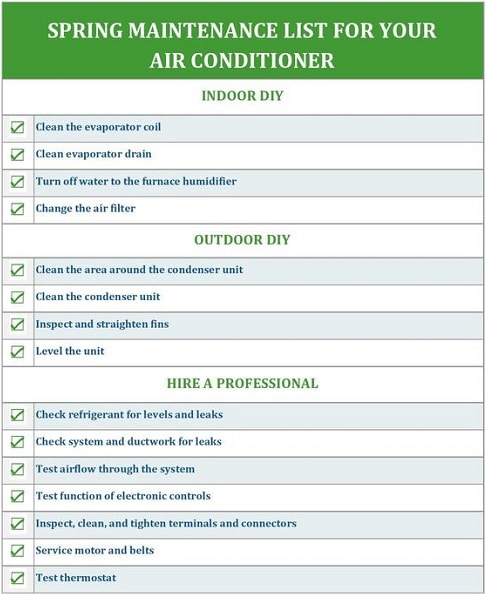
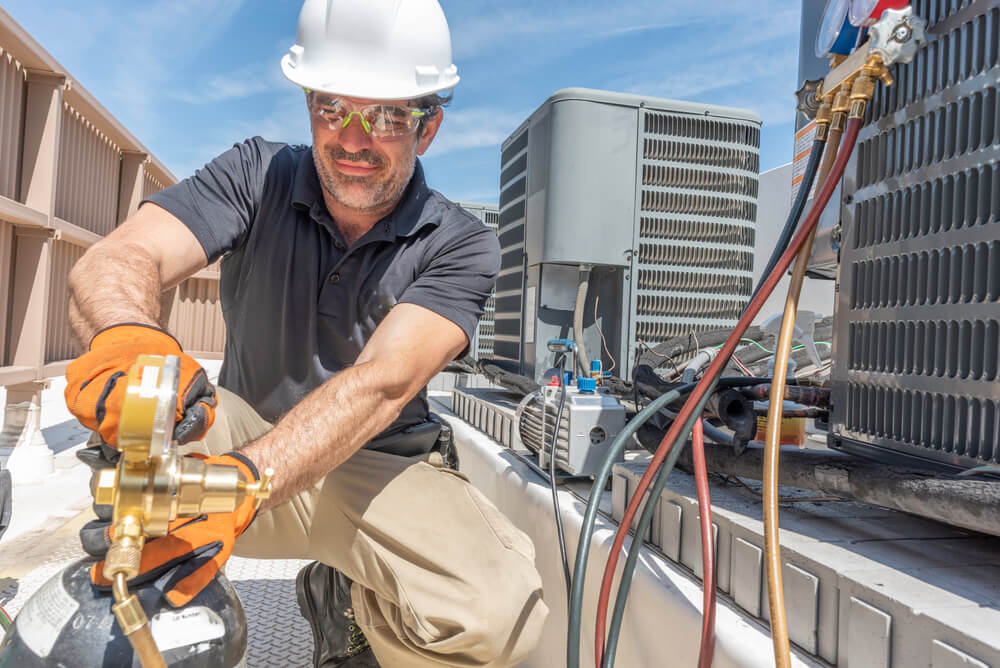
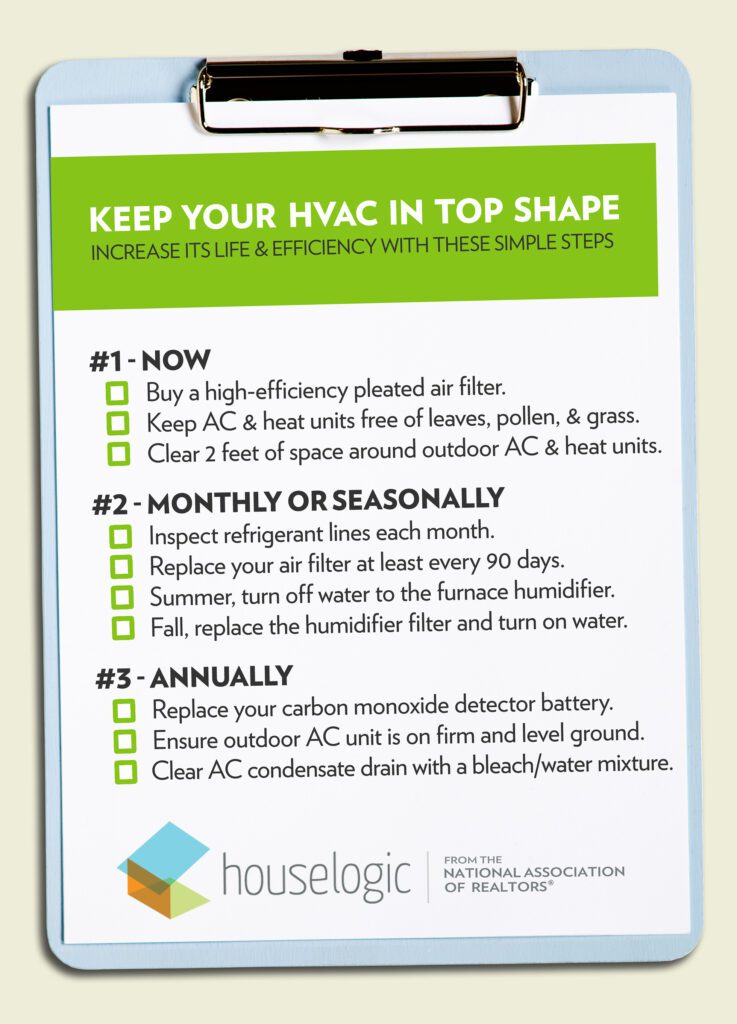
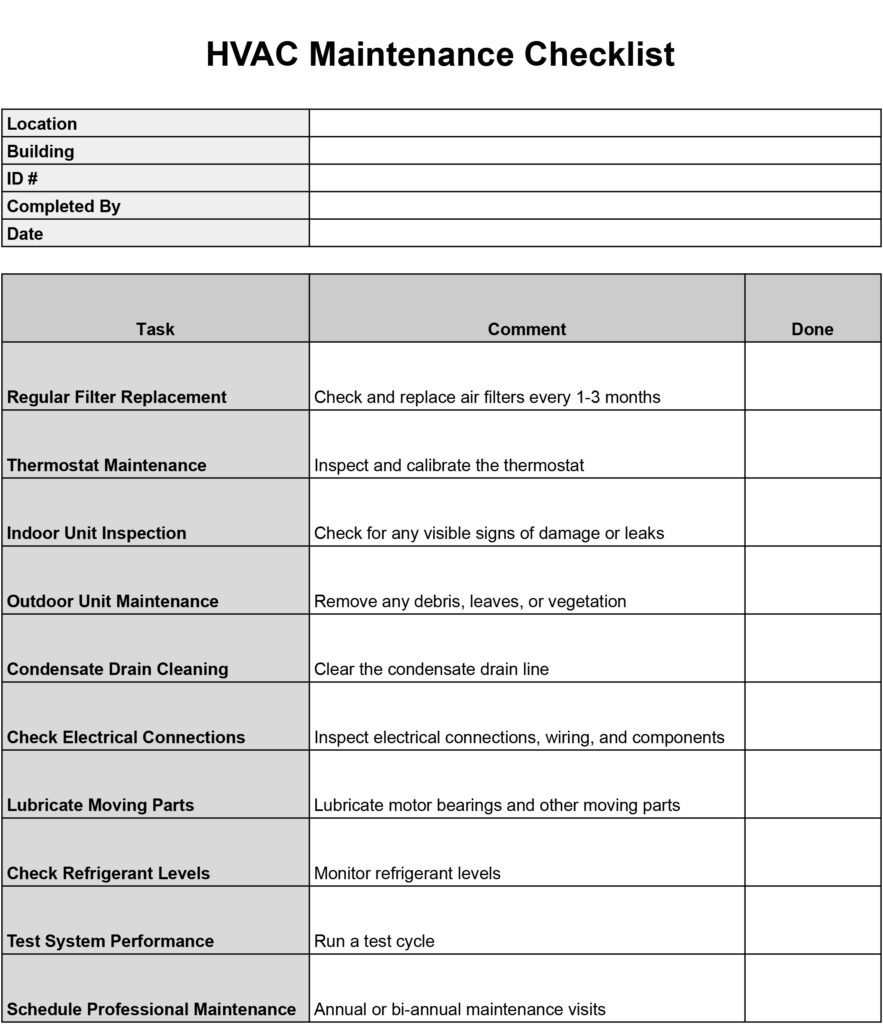
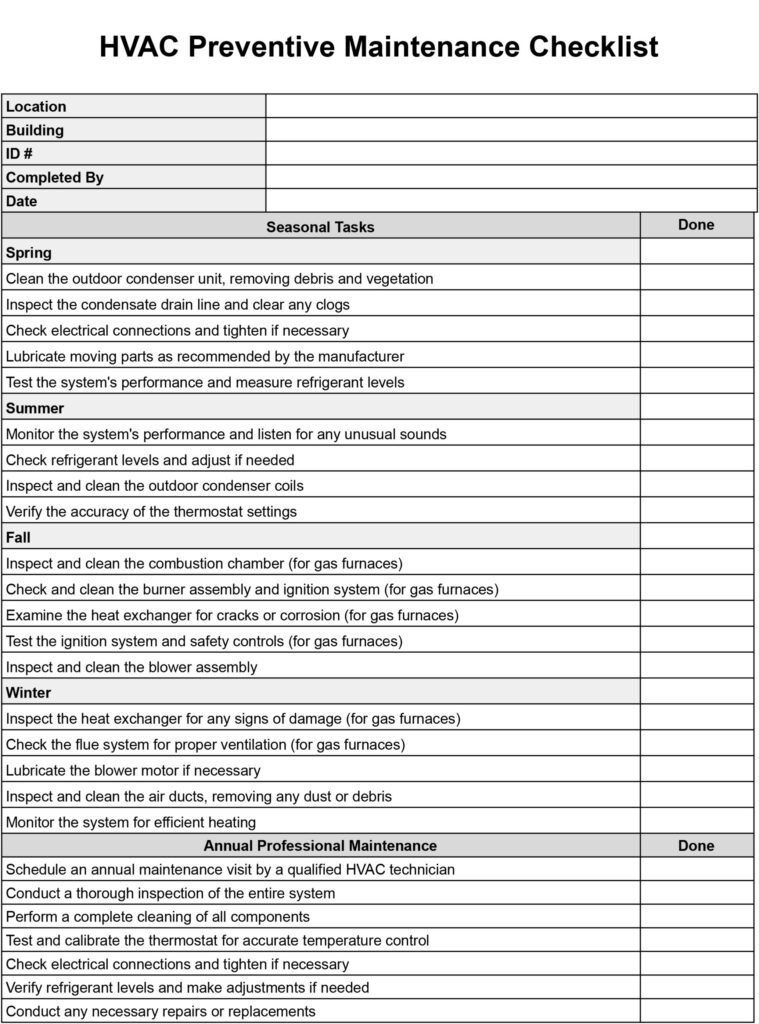
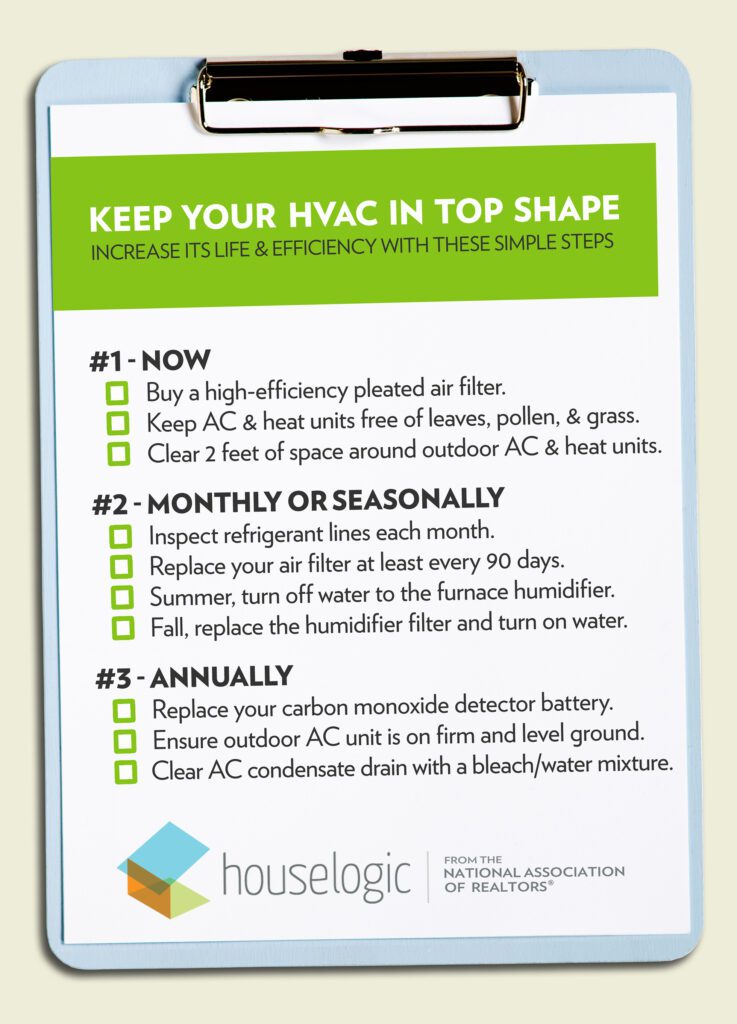
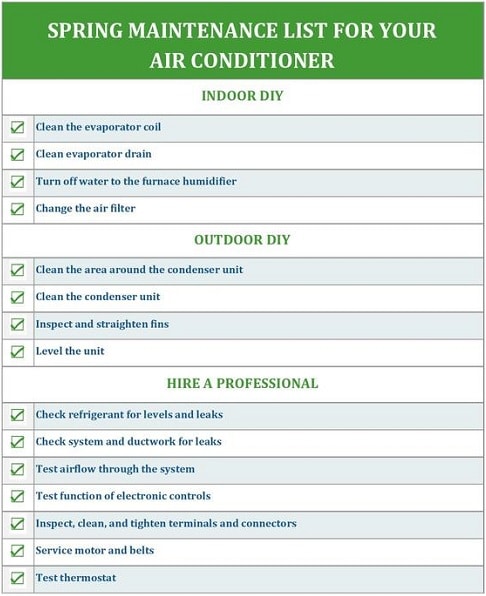
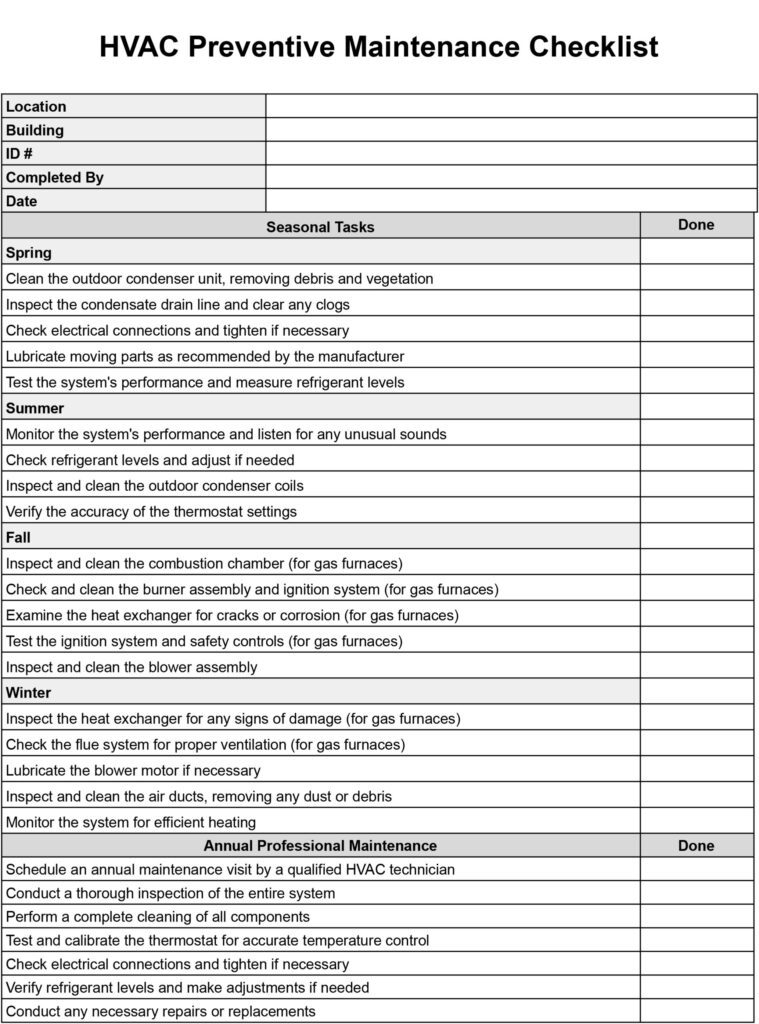
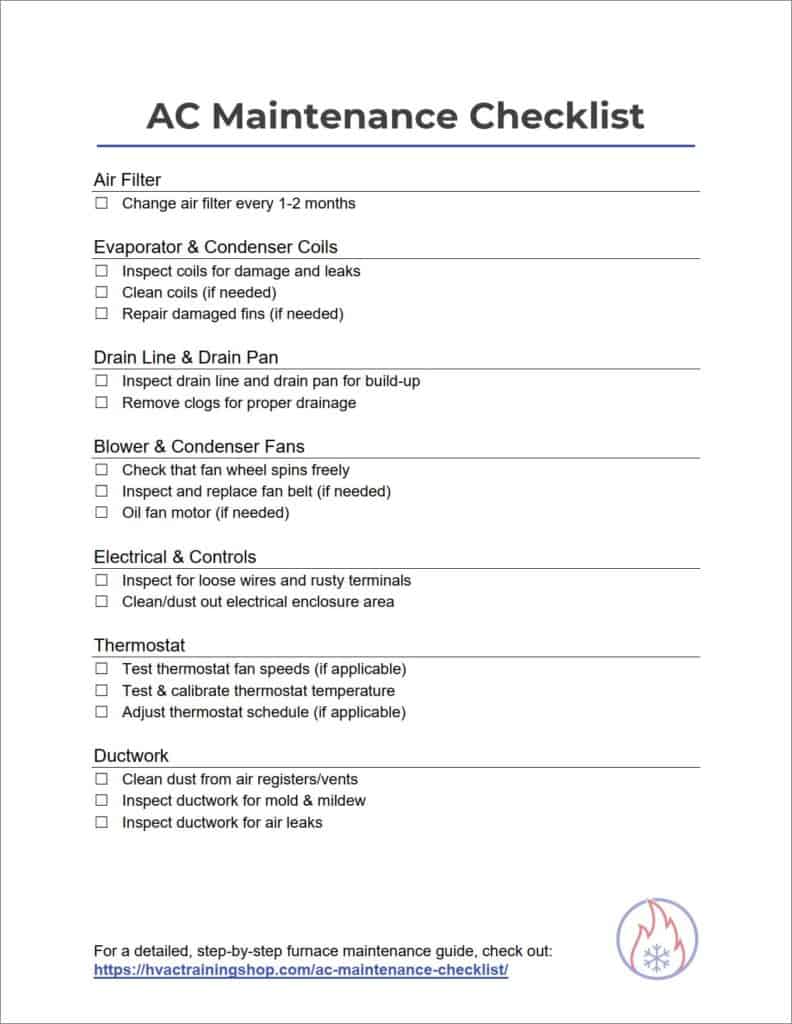
You’re probably wondering what the checklist is when it comes to servicing your HVAC system. Well, look no further! In this article, we’ve got you covered with all the essential steps you need to know. From inspecting the filters to checking the electrical components, we’ll walk you through each task to ensure your HVAC system is in tip-top shape. So, whether you’re a homeowner looking to maintain your unit or a technician seeking a handy reference, this checklist is a must-read! Let’s jump right in and make sure your HVAC system is running smoothly.

Diagnostic Check
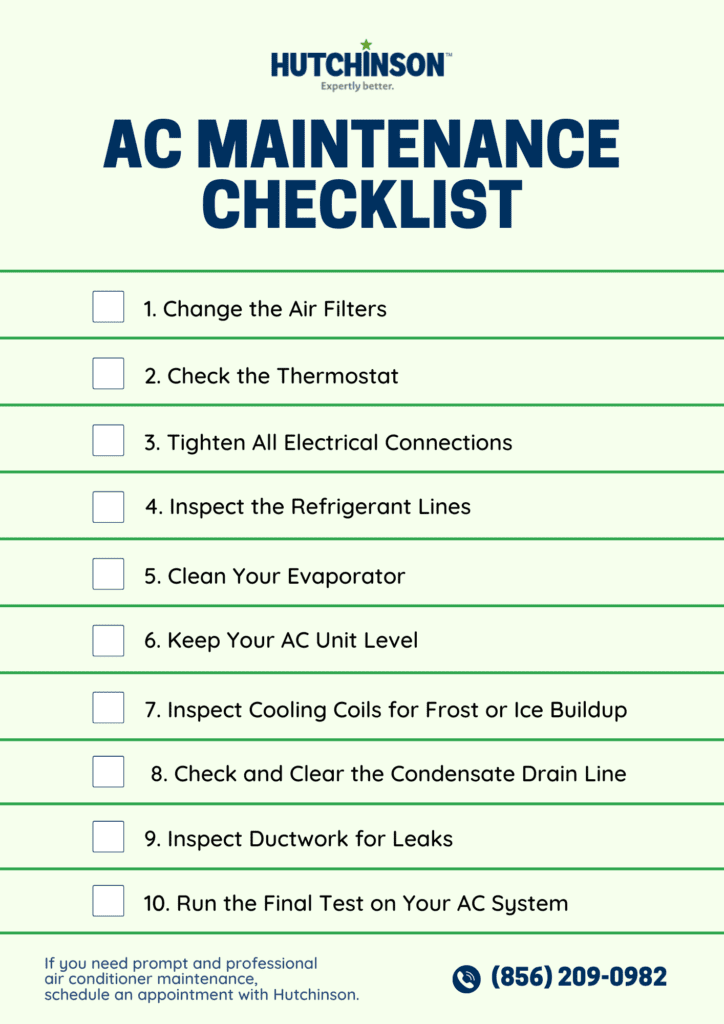
When it comes to servicing your HVAC system, it’s important to start with a comprehensive diagnostic check. This will help identify any potential issues and ensure that your system is running smoothly. There are a few key areas to inspect during this check.
Inspect Thermostat
Begin by inspecting the thermostat. Make sure it is functioning properly and reading the correct temperature. If you notice any issues, such as inaccurate readings or unresponsiveness, it may be time to replace the thermostat.
Check for Proper Power Supply
Next, check the power supply to your HVAC system. Make sure all connections are secure and that there are no tripped circuit breakers. A proper power supply is necessary for your system to operate efficiently.
Inspect Air Filters
Air filters play a crucial role in maintaining indoor air quality and keeping your HVAC system running smoothly. Check the filters for any dirt or debris and clean or replace them if necessary. Clogged filters can restrict airflow and put unnecessary strain on your system.
Check for Leaks
A thorough inspection should also include checking for any leaks in your HVAC system. Look for signs of water damage or pooling around the unit. Leaks can indicate a more serious issue and should be addressed promptly to avoid further damage.
Check for Refrigerant Levels
Lastly, check the refrigerant levels in your HVAC system. Low refrigerant levels can indicate a leak or other issue and can negatively impact the cooling capacity of your system. If you notice a significant drop in levels, it’s important to address the issue and recharge the refrigerant if necessary.
Electrical Components
To ensure the safe and efficient operation of your HVAC system, it’s important to inspect the electrical components. This will help identify any potential hazards or malfunctions before they cause major issues.
Inspect Circuit Breakers
Begin by inspecting the circuit breakers that power your HVAC system. Check for any tripped breakers and ensure that they are properly labeled. Reset any tripped breakers and monitor for any recurring issues.
Check Electrical Connections
Next, check all electrical connections within your HVAC system. Look for any loose or corroded wires and tighten or replace them as needed. Loose connections can lead to inefficiencies, malfunctions, and even electrical hazards.
Test Capacitors
Capacitors are responsible for starting the motors in your HVAC system. Test the capacitors to ensure that they are functioning properly. If you notice any signs of failure, such as swollen or leaking capacitors, they should be replaced promptly.
Inspect Wiring
Lastly, inspect the wiring within your HVAC system. Look for any signs of wear, damage, or fraying. Damaged wiring should be replaced to avoid electrical hazards and ensure the safe operation of your system.

Heat Exchanger
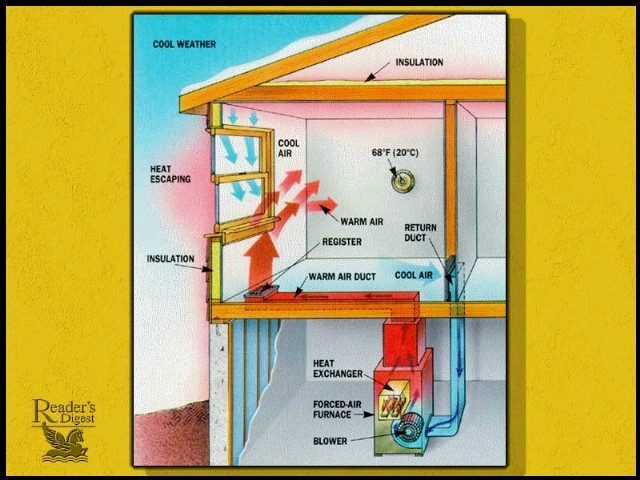
The heat exchanger is an essential component of your HVAC system’s heating functionality. It transfers heat from the combustion process to the surrounding air and should be inspected regularly to ensure optimal performance.
Inspect for Cracks or Rust
During your servicing, carefully inspect the heat exchanger for any cracks or signs of rust. Cracks can allow dangerous gases, such as carbon monoxide, to escape into your home. If you notice any damage, it’s important to replace the heat exchanger to maintain the safety and efficiency of your system.
Check for Proper Combustion
Additionally, check the combustion process in your HVAC system. A proper flame should be blue and stable. If you notice an inconsistent flame pattern or a yellow or flickering flame, it may indicate a problem that needs to be addressed by a professional.
Clean or Replace if Necessary
Finally, clean the heat exchanger if necessary. Over time, debris and soot can accumulate on the exchanger, hindering its ability to transfer heat efficiently. Use a soft brush or vacuum to remove any buildup, and if it is excessive or difficult to clean, consider replacing the heat exchanger.
Evaporator Coil
The evaporator coil is responsible for cooling the air in your HVAC system. It is located inside your home and can collect dirt and debris over time. Regular maintenance will ensure optimal performance and improve energy efficiency.
Inspect for Dirt or Debris
During your servicing, inspect the evaporator coil for any dirt or debris. Dust and other particles can accumulate on the coil and restrict airflow, leading to decreased cooling performance. If you notice significant buildup, it’s important to clean the coil to restore efficiency.
Clean If Necessary
If your evaporator coil is dirty, it’s important to clean it thoroughly. Use a soft brush or vacuum cleaner to remove any visible dirt or debris. Be gentle to avoid damaging the delicate fins of the coil. If the coil is heavily soiled, consider using a coil cleaner as recommended by the manufacturer.
Check for Airflow Restrictions
Finally, check for any airflow restrictions around the evaporator coil. Ensure that there are no obstructions, such as furniture or curtains, blocking the airflow. Proper airflow is essential for efficient cooling and can also help prevent freeze-ups and other issues.

Condenser Coil
The condenser coil is located in the outdoor unit of your HVAC system and is responsible for releasing heat to the surrounding air. It can become dirty from exposure to the elements and regular maintenance is necessary for optimal performance.
Inspect for Dirt or Debris
During your servicing, inspect the condenser coil for any dirt or debris. Dust, leaves, and other outdoor pollutants can accumulate on the coil and hinder its ability to release heat effectively. A dirty condenser coil can result in reduced cooling performance and increased energy consumption.
Clean If Necessary
If your condenser coil is dirty, it’s important to clean it thoroughly. Use a soft brush or a low-pressure water hose to remove any visible dirt or debris. Avoid using high-pressure water as it can damage the delicate fins of the coil. If the coil is heavily soiled, consider using a coil cleaner as recommended by the manufacturer.
Check for Airflow Restrictions
In addition to cleaning the condenser coil, check for any airflow restrictions around the outdoor unit. Ensure that there are no obstructions, such as overgrown vegetation or debris, interfering with the airflow. Proper airflow is essential for efficient cooling and can help prolong the life of your system.
Refrigerant Lines
The refrigerant lines in your HVAC system are responsible for carrying the refrigerant between the indoor and outdoor units. Leaks or improper pressure levels can affect the performance and efficiency of your system.
Check for Leaks
Inspect the refrigerant lines for any signs of leaks. Look for oil stains or wet spots around the connections or along the length of the lines. If you suspect a refrigerant leak, it’s important to have it addressed by a professional as it can lead to reduced cooling performance and potentially damage your system.
Test for Proper Pressure Levels
In addition to checking for leaks, it’s important to test the refrigerant pressure levels in your system. Proper pressure ensures that the refrigerant is circulating efficiently and that your system can cool your home effectively. If you notice any significant deviations from the recommended levels, it may indicate a larger issue that needs to be addressed.

Blower Motor
The blower motor is responsible for circulating the conditioned air throughout your home. A properly functioning blower motor ensures optimal airflow and comfort.
Inspect Motor and Fan Assembly
During your servicing, inspect the blower motor and fan assembly for any signs of wear or damage. Check for loose or damaged fan blades, worn-out belts, or excessive noise. If you notice any abnormalities, it may be necessary to repair or replace the blower motor to maintain proper airflow.
Check for Proper Functioning
In addition to inspecting for physical damage, it’s important to test the blower motor for proper functioning. Check that it starts and stops smoothly, and that air is being distributed evenly throughout your home. Any issues with the blower motor should be addressed promptly to ensure optimal performance.
Air Ducts
The air ducts in your HVAC system play a crucial role in distributing conditioned air throughout your home. Inspecting them regularly can help identify any leaks or blockages that may be affecting airflow and energy efficiency.
Inspect for Leaks or Blockages
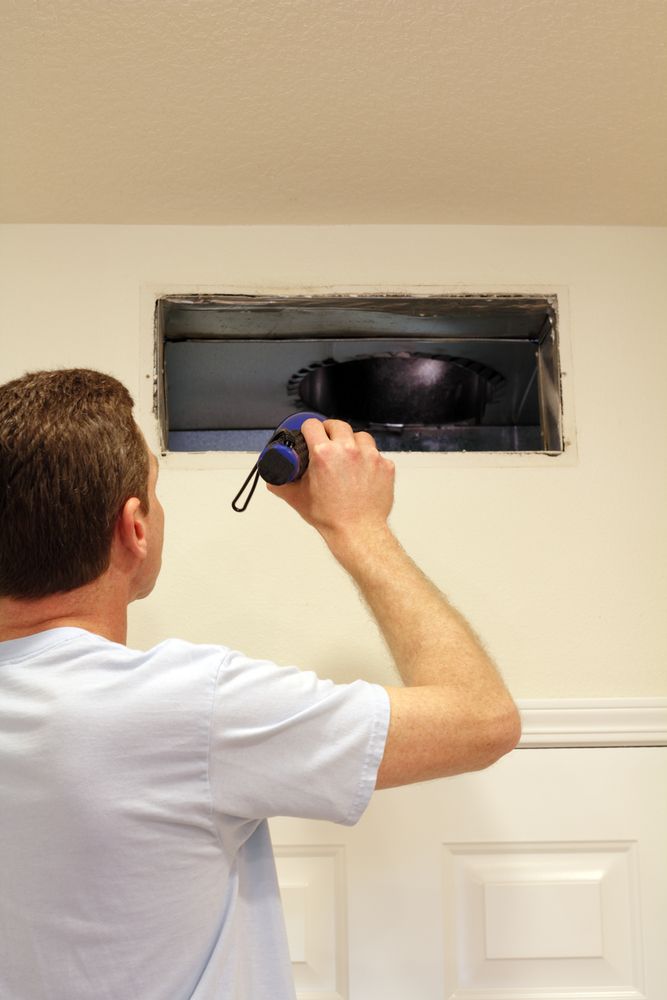
During your servicing, inspect the air ducts for any leaks or blockages. Look for disconnected or damaged sections where air may be escaping. Additionally, check for any obstructions, such as debris or pests, that may be blocking the airflow. Leaks and blockages should be repaired as soon as possible to maximize the effectiveness of your system.
Check for Proper Insulation
Proper insulation is essential for maintaining the efficiency of your HVAC system. Inspect the air ducts for any damaged or missing insulation. Ensure that the insulation is sufficient and properly installed to prevent energy loss. If you notice any issues, it may be necessary to repair or replace the insulation.

Thermostat
The thermostat is the control center of your HVAC system, and it is important to ensure that it is working properly. Regular maintenance of the thermostat can help maintain comfort and energy efficiency.
Calibrate Thermostat if Necessary
During your servicing, check the calibration of your thermostat. A poorly calibrated thermostat can lead to inaccurate temperature readings and inefficient cooling or heating. If you notice any discrepancies, refer to the manufacturer’s instructions or consult a professional to calibrate the thermostat properly.
Test Thermostat Controls
In addition to calibrating the thermostat, test all the controls to ensure they are functioning properly. Check that you can adjust the temperature settings, switch between heating and cooling modes, and activate any additional features your thermostat may have. Any issues with the controls should be addressed to maintain optimal comfort and energy efficiency.
Overall System Operation
To conclude your servicing, test the overall operation of your HVAC system. This will help identify any unusual noises, odors, or malfunctions that may require further attention.
Test Heating and Cooling Modes
Start by testing both the heating and cooling modes of your HVAC system. Check that warm air is coming from the vents when the heating mode is activated and cool air when the cooling mode is activated. If you notice any inconsistencies or a lack of temperature control, it may be necessary to further investigate the issue.
Check for Unusual Noises or Odors
Throughout the testing process, listen for any unusual noises coming from your HVAC system. Rattling, grinding, or squealing noises may indicate mechanical issues that need to be addressed. Additionally, pay attention to any unusual odors, such as burning or musty smells, as these can also be signs of a malfunction.
By following this comprehensive checklist during your HVAC system servicing, you can ensure that your system is running at its best. Regular maintenance and inspections will not only improve efficiency but also extend the lifespan of your system, providing you with optimal comfort for years to come.

